
Extending the PowerBI content pack for Project on the web
In September 2016, the Project team released the Project Online Power Bi Content Pack on GitHub. This release enables users of Power BI Desktop to customize and expand on the capabilities of the original Microsoft Project Online Content Pack released last year for use with the Power BI service available for Office 365.
This release of the content pack includes the basic instructions needed to connect the Power BI report to your Project Online portfolio.
Tips and Tricks to expand the content pack
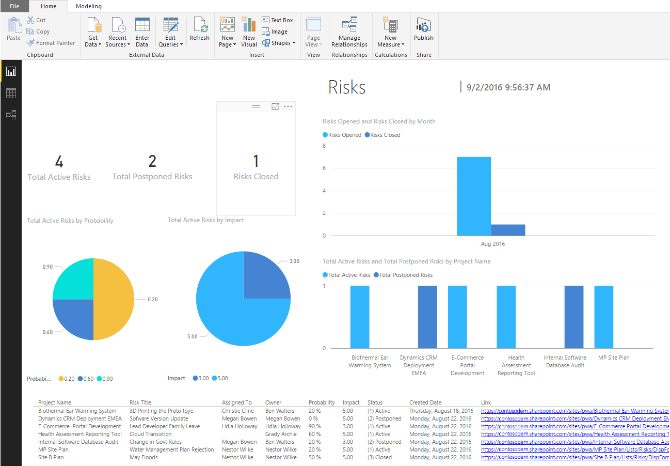
The content pack starts with data on risks, issues and work status for the entire portfolio of projects. It is a small sample of how Power BI and Project Online can work together to provide powerful insights into project portfolios.
The Project team is providing these tips & tricks to help customize this content and expand insights into different aspects of a portfolio.
Tip #1 Stay focused
After reading this blog post, resist adding all of the tables and fields from your portfolio. Even a modest portfolio in Project Online will have a large amount of data behind it. Bringing in everything can create long data updates and make creating useful data relationships more complex. Stay focused on the goal of the report such as costs and resources.
Tip #2 Add and Remove Fields
This content pack is an example on how to narrow queries towards the topic being explored. There are useful fields useful for other topics that have been excluded. Fields can be added back to the queries to expand or change the focus of the Power BI report.
Example: Exploring Costs and Cost Variations.
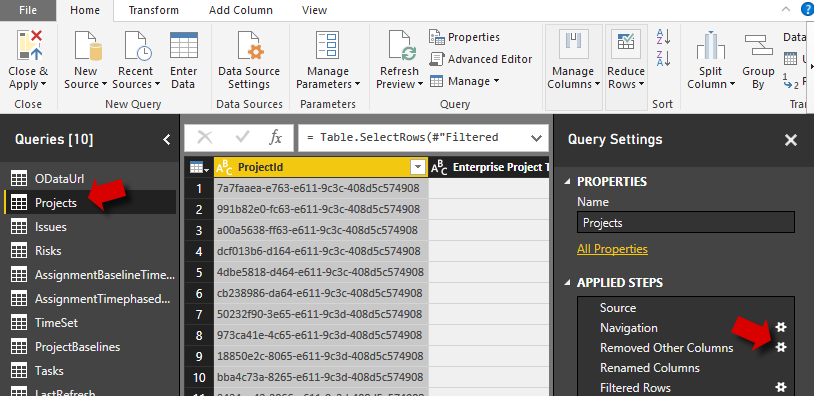
- Choose ‘Edit Queries’ on the ribbon and select on the ‘Projects’ table at the left.
- On the right side under ‘Query Settings’ select the gear icon next to ‘Removed Other Columns.’
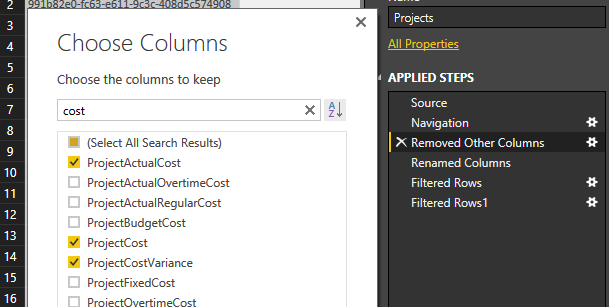
- Type “Cost” into the ‘Search Columns’ control.
- Add the fields ‘ProjectActualCost’, ‘ProjectCost’ and ‘ProjectCostVariance.’ These are all standard Project fields.
- Select ‘Close & Apply’ on the ribbon in the ‘Edit Queries’ window, then choose ‘Refresh’ on the main Power BI window’s ribbon.
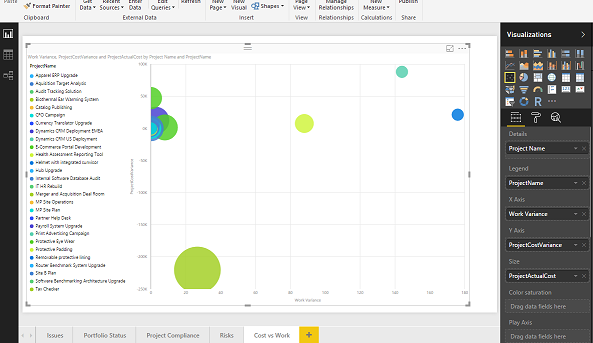
Just adding in those fields allows the creation of this scatter chart looking at both work and cost variances in
Tip #3 add and remove data tables
For users wanting to look at resource allocation the base report is missing two key tables of ‘Resources’ and ‘Assignments.’ The content pack design has made it easy to bring in new Project Online data tables.
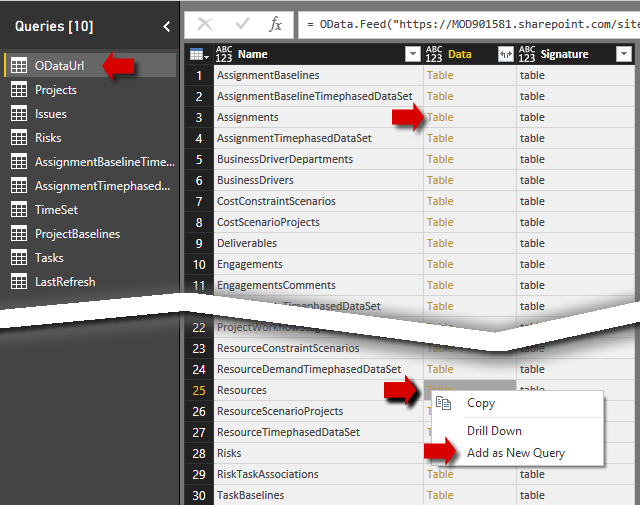
- Choose ‘Edit Queries’
- Select the ‘ODataUrl’ query in the left hand column.
- Right-click on the on the word ‘Table’ next to “Resources” and choose ‘Add as New Query’
- Do the same for ‘Assignments’
Also as in Tip #2, edit the ‘AssigmentBaselineTimePhasedDataSet’ and ‘Assignment Baseline Work’ queries to add back in the field ‘ResourceID’ in each table to explore this data as it relates to resources not just projects.
- Choose ‘Close & Apply’ on the ribbon.
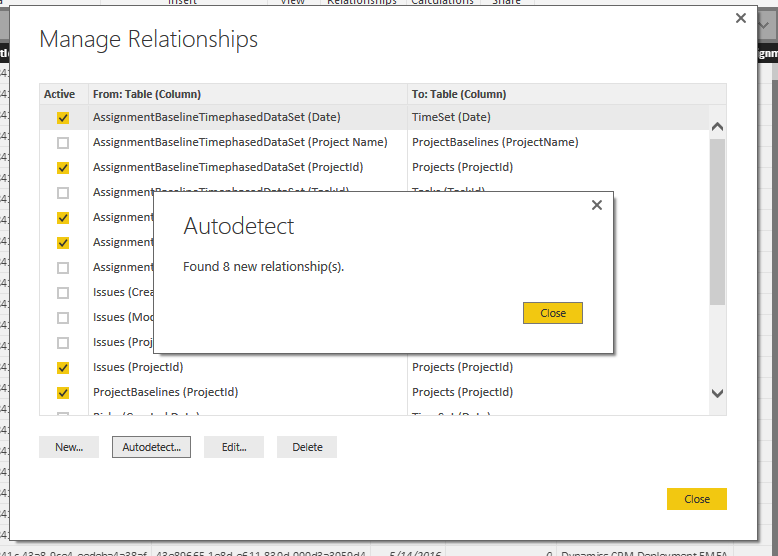
- On the ribbon of the main Power BI screen, select ‘Manage Relationships’ and click the ‘Auto Detect’ button at the bottom. Power BI will discover the new data relationships in the report. When complete, it will display how many new relationships it found now that new data and fields have been added in.
Using the additional data and relationships, a stacked column chart using ‘ResourceName’*, ‘Project Name’ and ‘Assignment Baseline Work’ is possible. This one where the work of each resource is allocated.

*Note: The added fields don’t have spaces in the name. That is created by using the ‘Rename Field’ feature of Power BI. Doing this will make charts look more professional and improve natural language queries if the data is brought into cloud for use with Power BI service in Office 365.
Tip #4 Let Power Bi help find insights
Now that the report has added fields and tables there are insights in this data that may be missed. The Power BI service available for Office 365 has features that will discover new insights and let the user pin the useful ones to dashboards.
- Open the Power BI service in Office 365
- On the ‘Welcome’ page choose the ‘Files’ option and load your update version of the Power Bi report from the content pack.
Natural Language Q&A
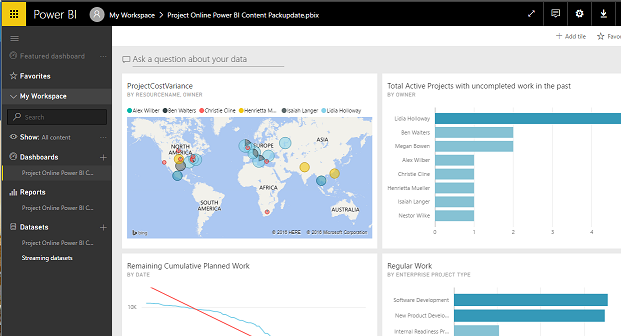
Power BI will start on an empty dashboard with a single object representing all the data and connections in the report just loaded. It is ready to accept questions about the data in natural language.
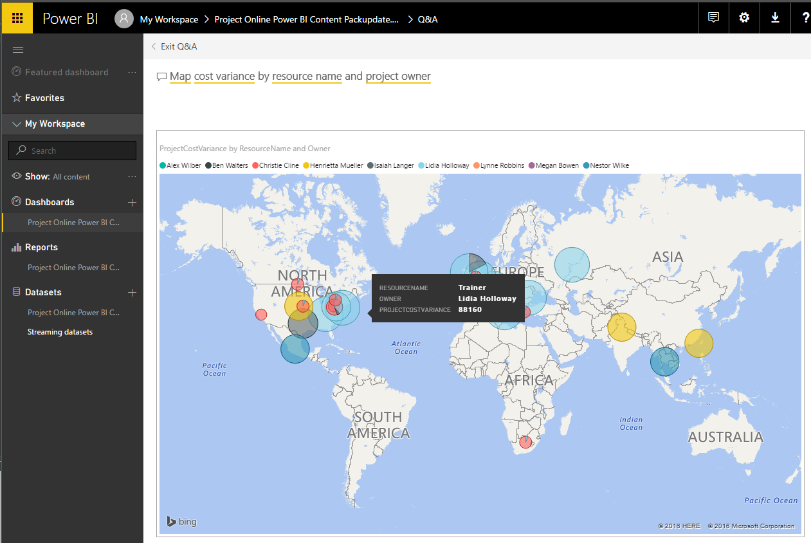
Example: Ask Power Bi to “Map cost variance by resource name and project owner” and it provides a geographical view of your cost variances tied to the resources and project owner.
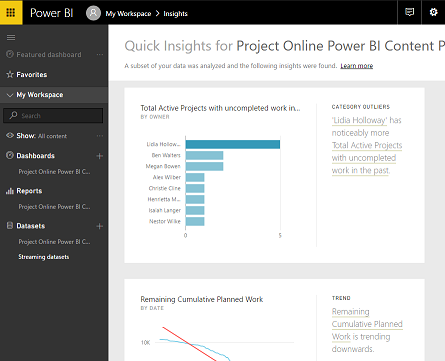
Power BI Quick Insights
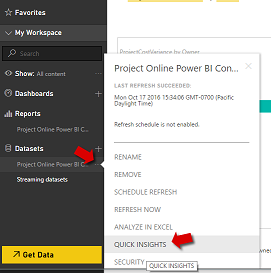
Next choose the ellipses ‘…’ menu for the dataset and select ‘Quick Insights’. After a few seconds or minutes, depending on the dataset, Power BI will offer some insights it sees in the data. Some will make no sense and some may expose issues. It appears Lidia is running behind on her projects or on her updates of the project status.
 |
 |
A Power BI dashboard is born
When the Natural Language Q&A and the Quick Insights create a visual worth keeping, just pin them to the dashboard. This is just the beginning of how Project Online Power Bi Content Pack can provide powerful views into Project Online portfolios.
 Light
Light Dark
Dark