
Setup SharePoint 2013 Developer VM on Azure
In the past setting up a SharePoint Development box was a complex and tedious experience where a little misstep would, most likely, lead to resetting the machine and starting over. So now we have Virtual Machines on Azure, specifically there is a Marketplace image that has SharePoint Server 2013 Trial setup and Visual Studio 2015 with the Office tooling installed. That’s most of the software that is needed to start developing against SharePoint using a single box, but we have a few items to do first.
Create Virtual Machine on Azure using SharePoint Server 2013 Trial Marketplace image
This is fairly straight forward, there a several different posts about how to create VMs. The condensed version is to fire up the Azure Portal on your favorite browser, select New Virtual Machines, search for SharePoint Server 2013 Trial.

Select the Marketplace image and Create filling in the information that is presented to you in the different blades to customize the VM. On the last blade before the VM is actually created there is the option to download the ARM template and parameters files. These files and a Powershell deployment script will allow you to recreate this VM without having to go through the Azure portal.
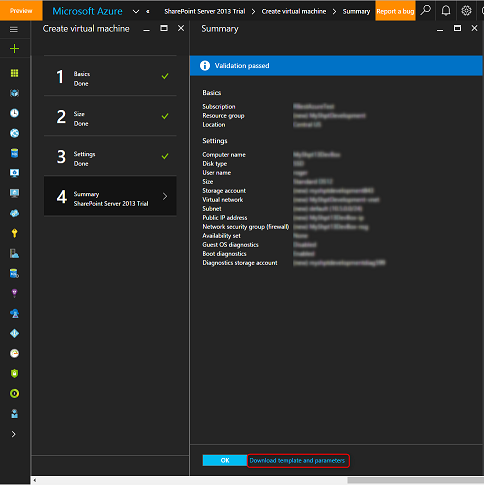
Select OK, and the Virtual Machine is created. Once the box is running attach to it using the Connect and the generated .RDP.

Install SQL Server 2012 Express locally
The SharePoint Server 2013 standalone installation did was to install SQL Server 2008 r2 Express locally which SharePoint would use as the data storage, but SQL Server 2012 Express works as well. So download and select a “New SQL Server stand-alone installation or add features to an existing installation” using the default options for the wizard options. Notice under the “Database Engine Configuration” SQL will be using Windows authentication mode with the current user as the administrator, even if that user is a local account only. As this box is being setup as a development machine this will work best. If the machine is to be used for non-development usage there is a different set of instructions for Setting up a SharePoint Farm. Now that SQL Server is installed on the VM, we can move onto getting SharePoint configured.
Creating SharePoint Configuration Database
To create the SharePoint Configuration Database using the SQL Server administrator account, we will use the New-SPConfigurationDatabase in Powershell. This is an impressive script:
Add-PSSnapin Microsoft.SharePoint.Powershell
New-SPConfigurationDatabase -DatabaseName “<YourDBName>” -DatabaseServer “<usually ComputerNameSQLEXPRESS>” -AdministrationContentDatabaseName “<YourOtherDBName>”-Passphrase (ConvertTo-SecureString “<new passphrase>” -AsPlainText -force) -FarmCredentials (Get-Credential)
This will prompt for the FarmCredentials which will be the user name and password for the SQL Server Administrator. So now the databases are created and ready for use.
Configuring SharePoint
The last piece of the puzzle is to run the SharePoint 2013 Products Configuration wizard. Since the SharePoint databases have been created, the wizard will automatically pick this up. For this example, I created a VM named SHPT13DevBox and the database SP_ConfigDB with the New-SPConfigurationDatabase

Select Next

Select Next
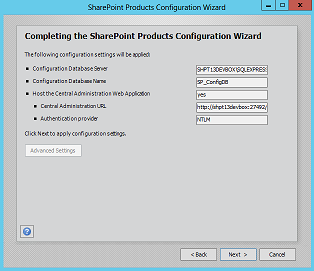
Select Next and Finish which will configure the SharePoint Server.
Creating the default SharePoint site collection.
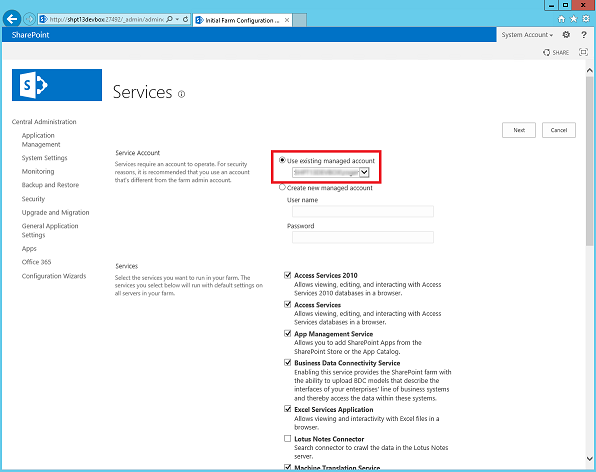
When the wizard has finished the default browser will open to the SharePoint Admin site and will, most likely, ask for the Farm Credentials user name and password. Select the “Start the Wizard” option

Select the “Use existing managed account” and review the services being installed. Some services may need additional information or setup and may fail, if not configured properly. The SharePoint Farm will be configured properly even if some services fail.
The final step is to setup the Developer site collection. The Site Collection requires a title and setting the template to the Developer site. To improve the development experience changing the URL from “/my” to the simple “/” will set the developer site as the default site.
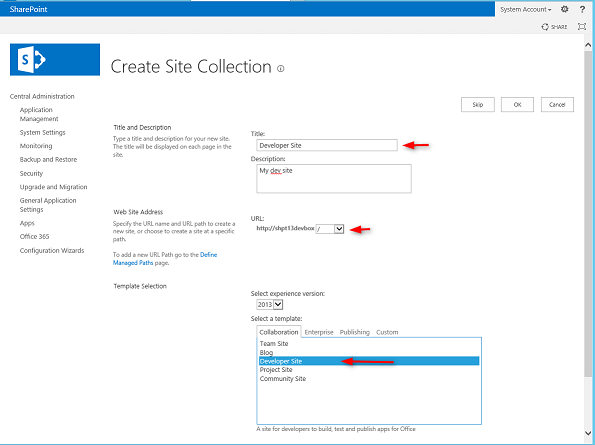
Select OK and the Developer site is created.

The Developer box is now ready for business!
Can I automate this?
The simple answer is YES! There are various articles available on using Powershell Microsoft.SharePoint.Powershell PsSnapin and SharePoint PSConfig.exe to run the SharePoint configuration and to setup the site collection. Finding the right solution depends on your needs and expertise. Here is a set of different ways automate the VM creation.
– Azure Resource Manager template
– Azure DevTest Labs with Artifacts
I hope this helps!
Roger Best – Senior Software Engineer, Microsoft
 Light
Light Dark
Dark