
A Lap around Microsoft Graph Toolkit Day 2 – Zero to Hero
Welcome to Day 2 of the A Lap Around Microsoft Graph Toolkit blog series! Today’s blog post will walk you through the setup needed to follow the samples and exercises throughout the blog series and show you how to get started using Microsoft Graph Toolkit in your application. For today’s exercise, we’ll be creating a simple web application that allows a user to sign in and view their calendar events.
Setup your development environment
Join the Microsoft 365 Developer Program and create a developer subscription
The samples in this blog series will be easiest to follow when using a tenant where you have admin access. We strongly recommend creating a Microsoft 365 developer subscription which gives you access to a demo tenant with you as the Global Administrator for development purposes.
Download tools
To follow along with the samples, you will need the tools listed below. If you don’t have them already, you can install them from these links.
- A text editor or IDE. You can install and use Visual Studio Code for free.
- Live Server or a similar lightweight development server.
Register your application
To follow along with the exercises in this blog series, you will need to create a new Azure AD web application registration in the Azure Portal.
- Login to the Azure Portal using the account you created with your developer subscription.
- Select Azure Active Directory in the left-hand navigation, then select App registrations under Manage and click New registration.
- On the Register an application page, set the following values:
- Set Name to MGT Zero to Hero (or any name you would like for your application)
- Set Supported account types to Accounts in any organizational directory
- Under Redirect URI, set the drop-down to Web and set the value to http://localhost:3000/

4. Click Register. Locate your application (client) ID. You will need to reference this later. You can use this client ID for this sample as well as any other samples throughout the blog series.
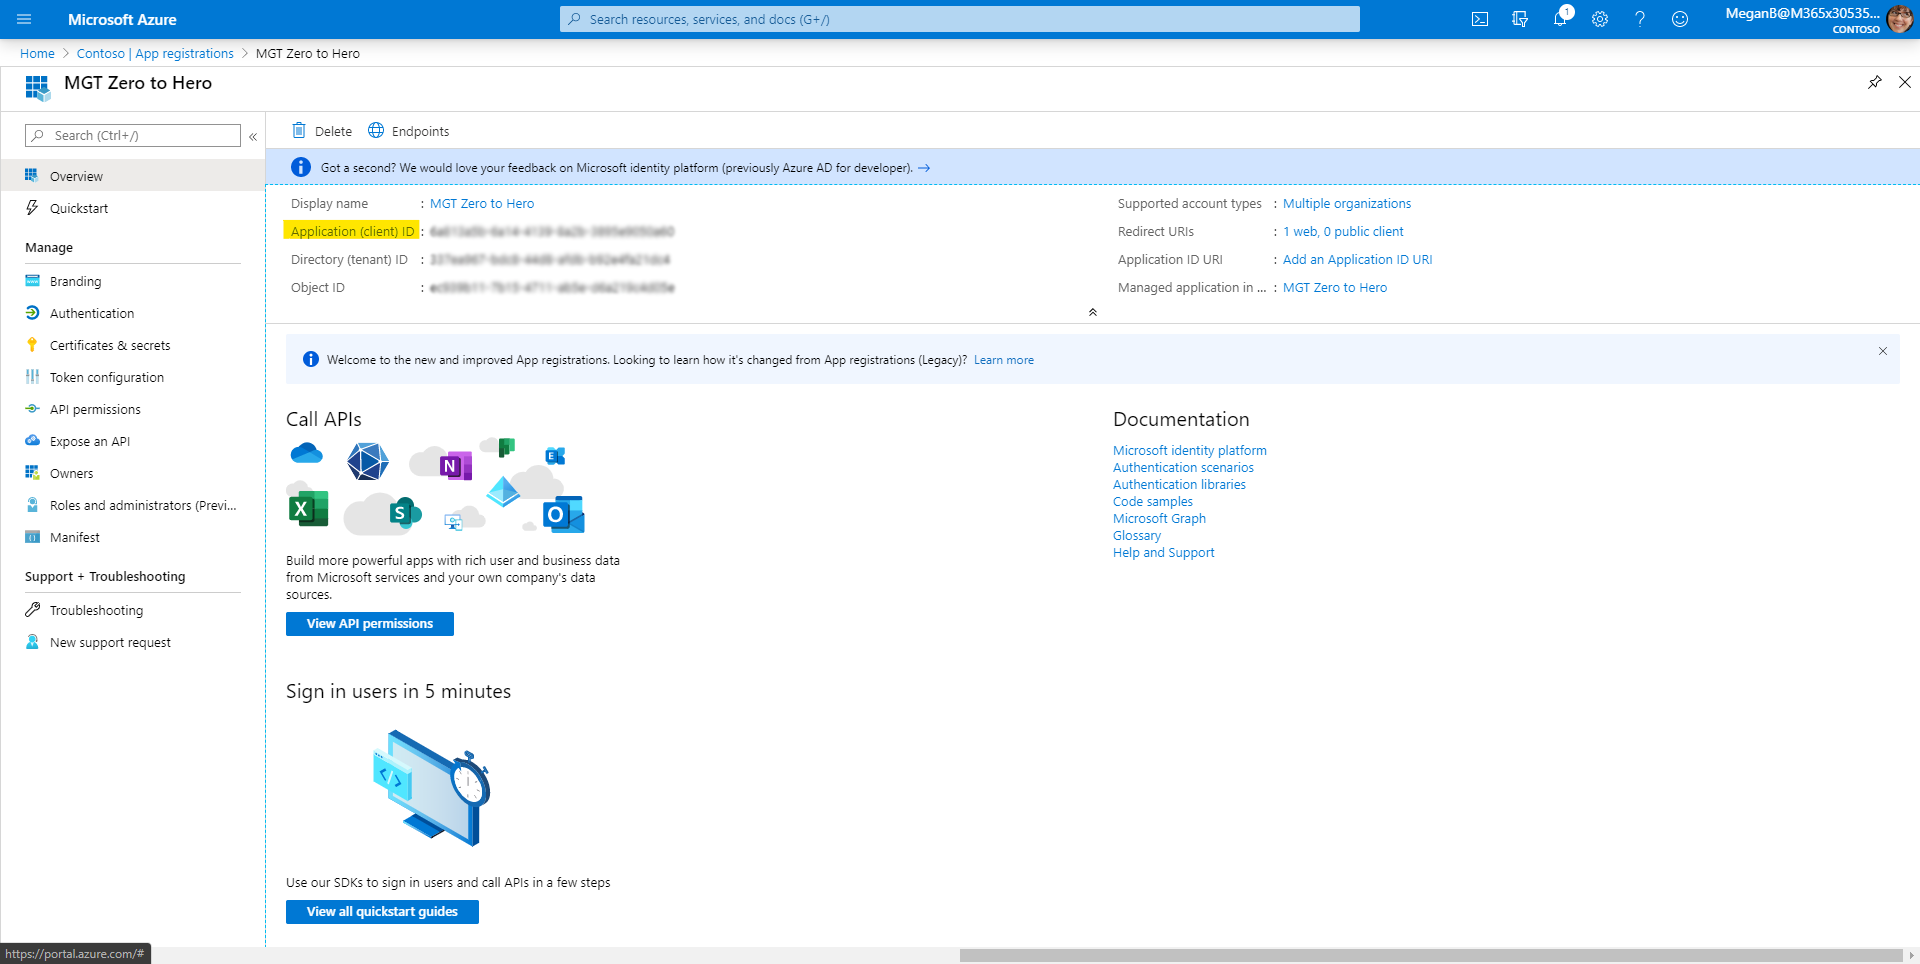
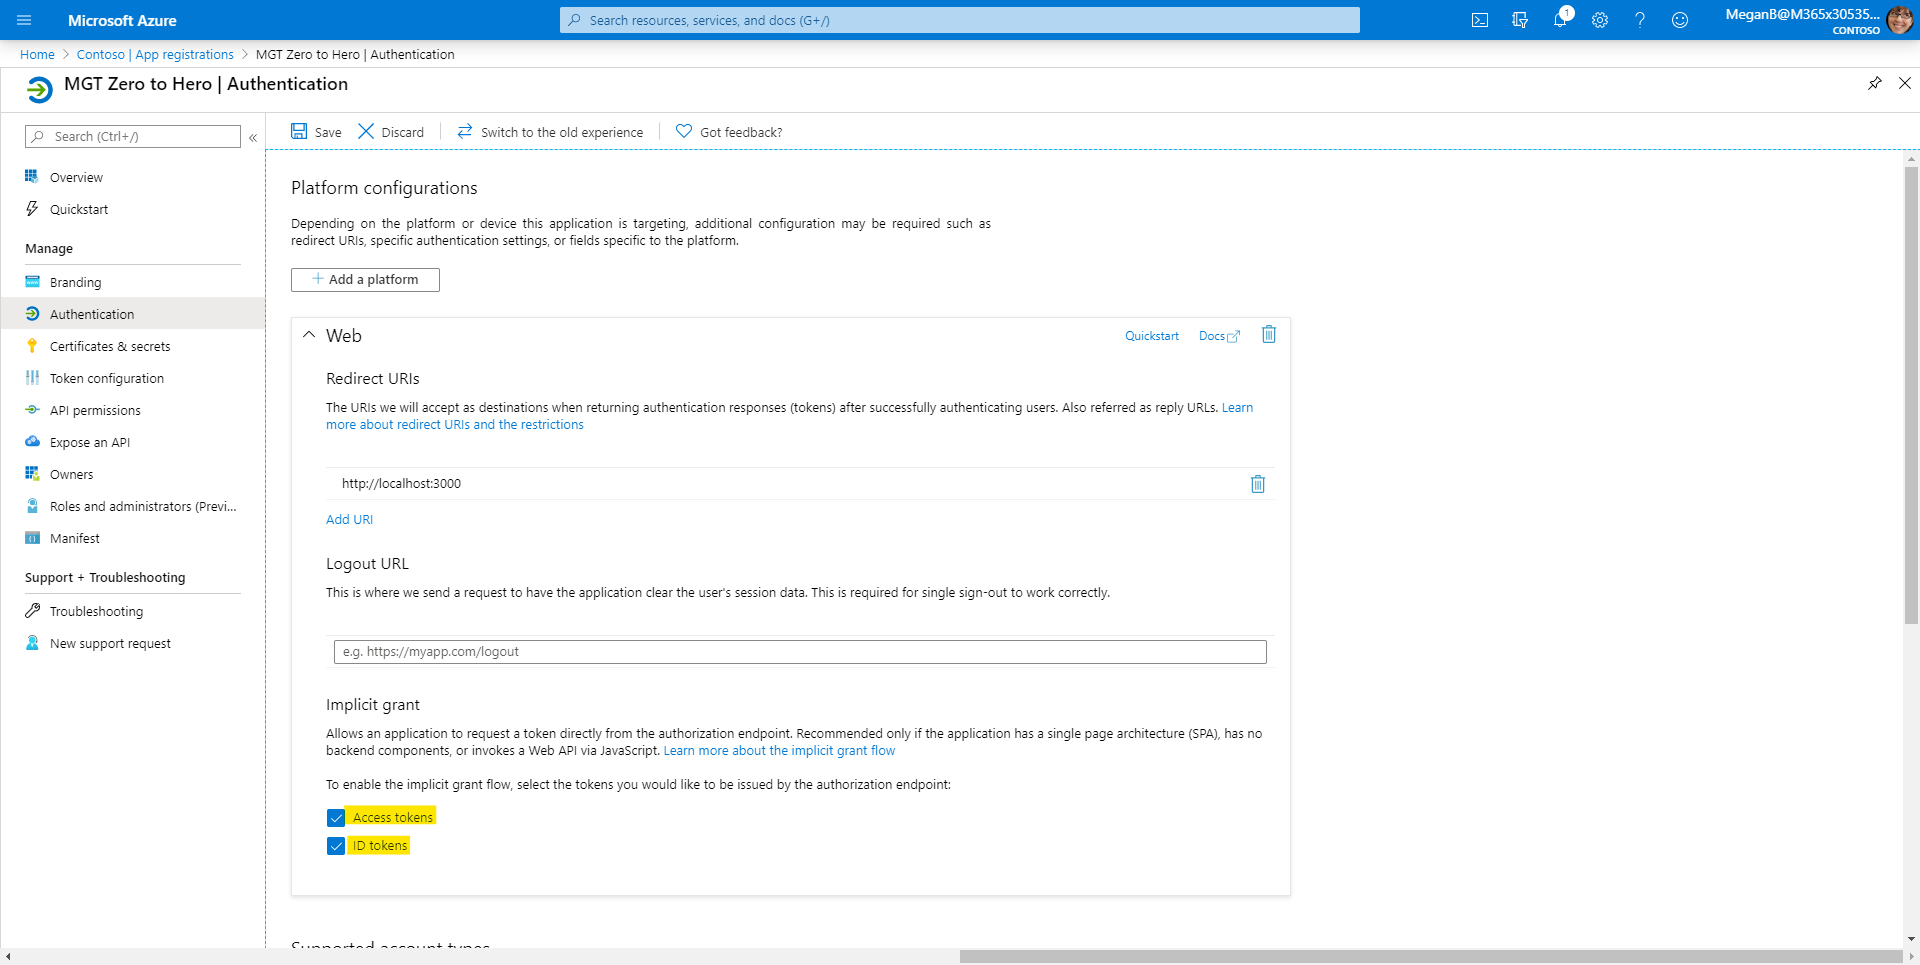
5. Under Manage on the left-hand navigation, select Authentication. Locate the Implicit Grant section and enable both Access tokens and ID tokens, then click Save.
Create your application
- In the directory of your choice, create a folder for your project.
- Add an index.html file to the root of your project folder and add the basic construction of an HTML file, as shown below, and save the file.
<!DOCTYPE html>

<html>
  <head>
  </head>
  <body>
     <title>Welcome to MGT!</title>
  </body>
</html>
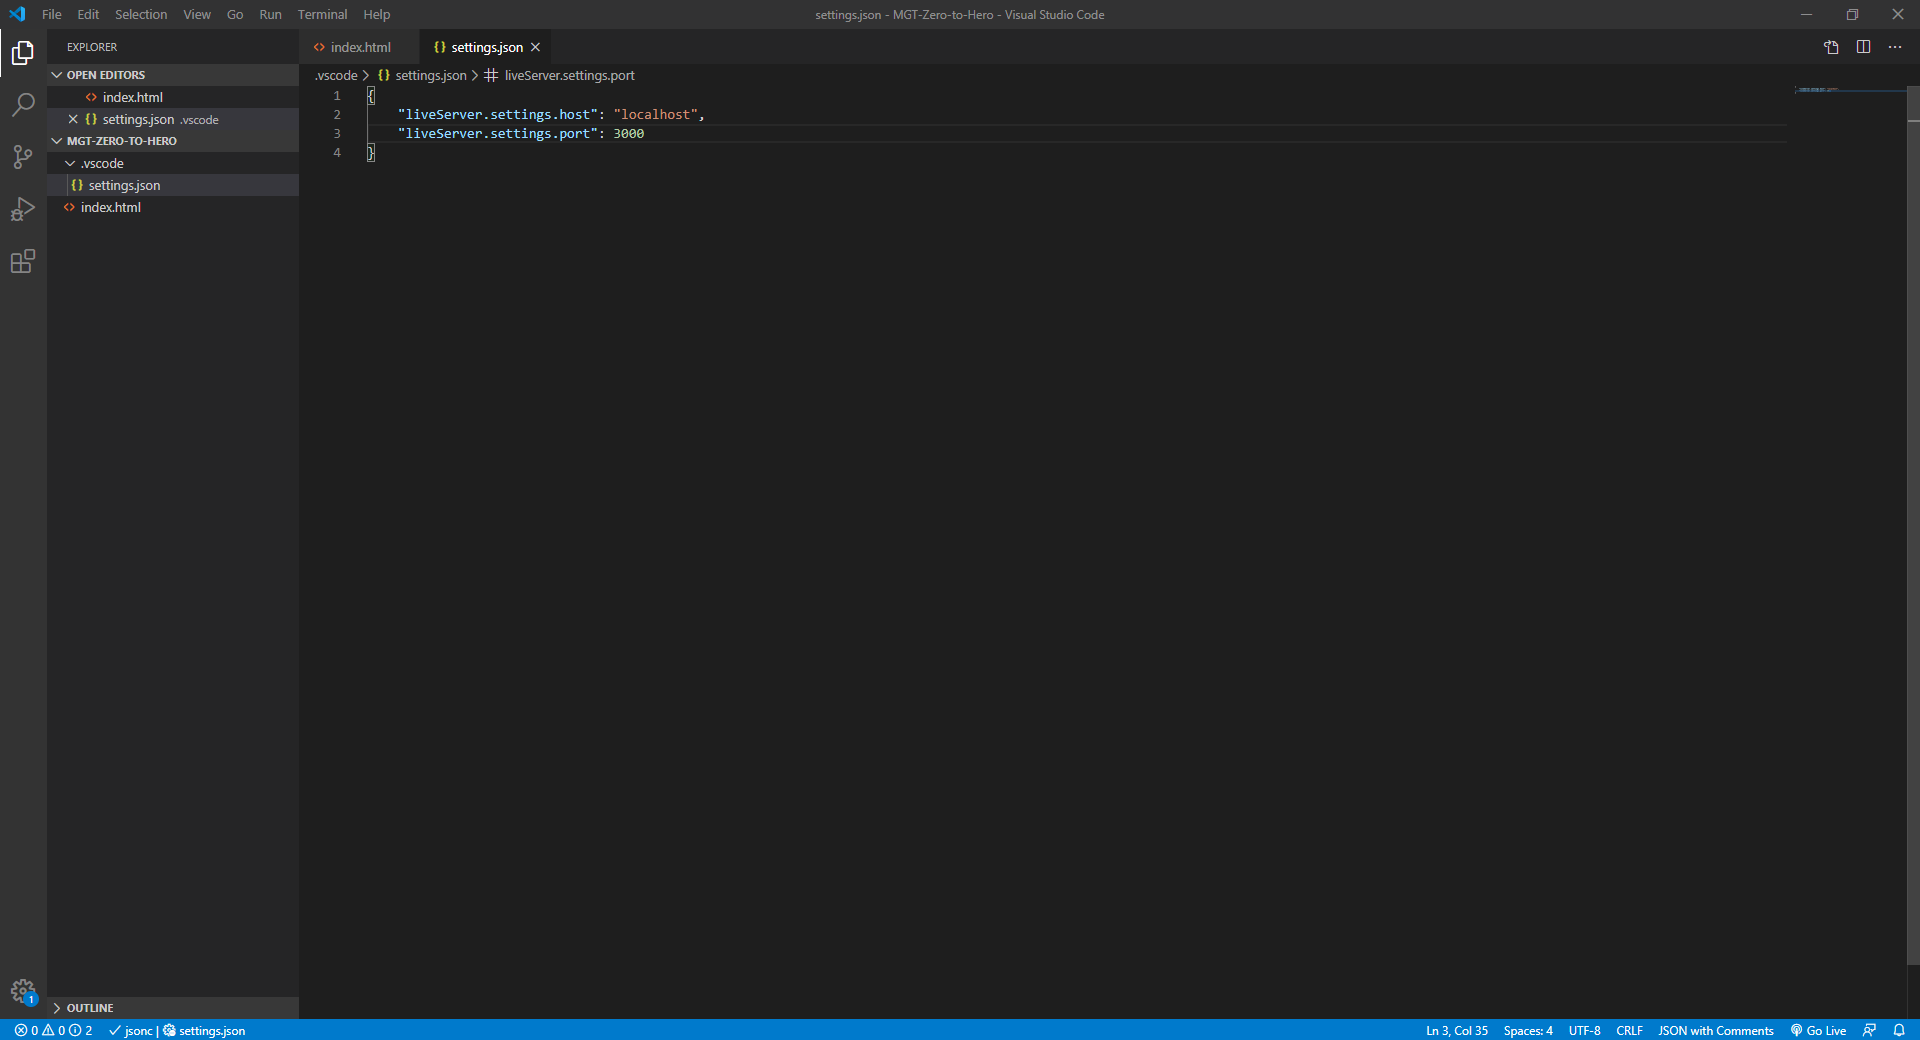
- Add a folder named .vscode to the root of your project folder and add a file named settings.json inside of that folder. Copy and paste the below code into settings.json and save the file.
{
    "liveServer.settings.host": "localhost",
    "liveServer.settings.port": 3000
}
- Right click on the index.html file in the Explorer pane and click Open with Live Server. The server will start and automatically open your index.html page in your default browser at http://localhost:3000. Your page will automatically refresh to display any changes you make from now on.
- You should now see “Welcome to MGT!” in the browser.
Add Microsoft Graph Toolkit to your application
Now, you will add Microsoft Graph Toolkit to your application. In this sample, we will reference the loader directly via unpkg. Add the following code inside the head of your HTML.
<script src="https://unpkg.com/@microsoft/mgt/dist/bundle/mgt-loader.js"></script>
Note: MGT can also be added by installing the npm package if you’re using Node.js. To do this, add the npm package:
npm install @microsoft/mgt
And reference the components:
<script src=”node_modules/@microsoft/mgt/dist/es6/components.js></script
Add the MSAL Provider
The Microsoft Graph Toolkit providers enable authentication and Microsoft Graph access for the components. We have a number of providers available, but for this example we’ll be using the MSAL provider which uses MSAL.js to sign in users.
Add the MSAL provider by adding the following line to the body of your HTML.
<mgt-msal-provider client-id="[YOUR-CLIENT-ID]"></mgt-msal-provider>
Replace [YOUR-CLIENT-ID] with your application(client) ID that you saved in step 4 of the Register your application section above.
Add the login component
Now, you will add the login component to your application. Add the following line to your index.html file right after the MSAL provider.
<mgt-login></mgt-login>
Your index.html file should now look like this:
<!DOCTYPE html>

<html>
    <head>
        <script src=node_modules/@microsoft/mgt/dist/es6/components.js></script>
   </head>
   <body>
        <title>Welcome to MGT!</title>
         <mgt-msal-providet client-id=”[YOUR-CLIENT-ID]”></mgt-msal-provider>
         <mgt-login></mgt-login>
   </body>
</html>
Save the file and once your application refreshes, you should see a sign in button. When clicked, it will take you through the authentication flow then redirect you back to your home page. The component will show your profile information to indicate that you’re signed in, and you can click the component to sign out.
Add additional components
Now that you’ve successfully created a login experience that authenticates a user, you can add any of the other components to your application. In the example below, we’ve added the agenda component to display the signed-in user’s upcoming calendar events.
<mgt-agenda></mgt-agenda>
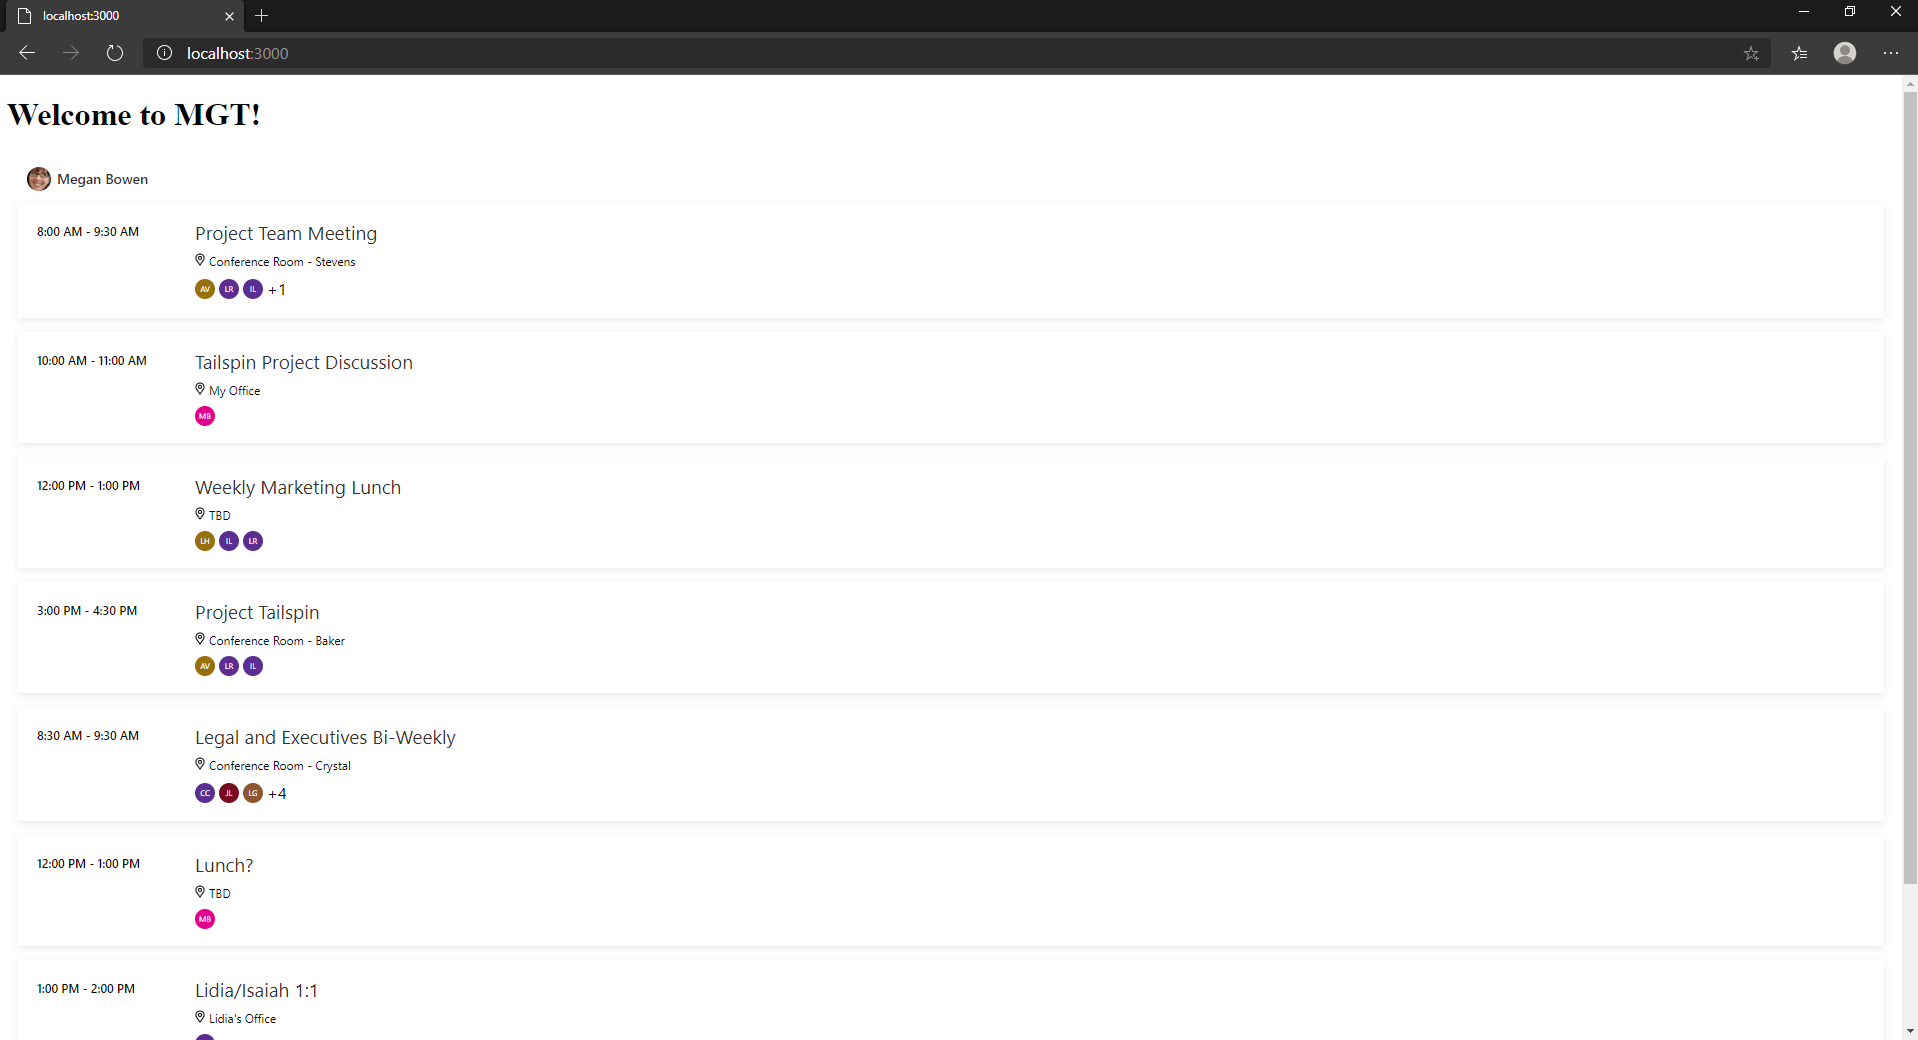
Super easy, right? It only took a couple lines of code! Microsoft Graph Toolkit makes it quick and easy to integrate Microsoft 365 experiences like these into your application with very little code.
Tune in for the next post in the series on April 20th where we will cover all of the components in MGT and their features.
 Light
Light Dark
Dark