Using PIX to optimize your PC builds and diagnose issues
Learn more about GPU Captures and Timing Captures in PIX and how they can help you improve your game’s performance.

Recently, our team created a series of videos to introduce developers to PIX, the game-focused profiling tool from Microsoft for Windows games. PIX is the profiler that’s used by game studios to optimize the PC build of their 64-bit, C++, and DirectX 12 games. Developers can use PIX to solve lots of performance issues that are common in games, including issues related to the GPU, CPU, memory, or file IO. For example, PIX is great at helping you diagnose spikes in frame time, finding memory leaks, or finding inefficient file IO patterns, along with other common issues that affect game performance.
In our first video, I’ll introduce the two PIX capture types, GPU Captures and Timing Captures, and then we’ll look at how to start and stop captures. Watch the video below, or head to the Microsoft Game Dev YouTube channel to open it in a new window.
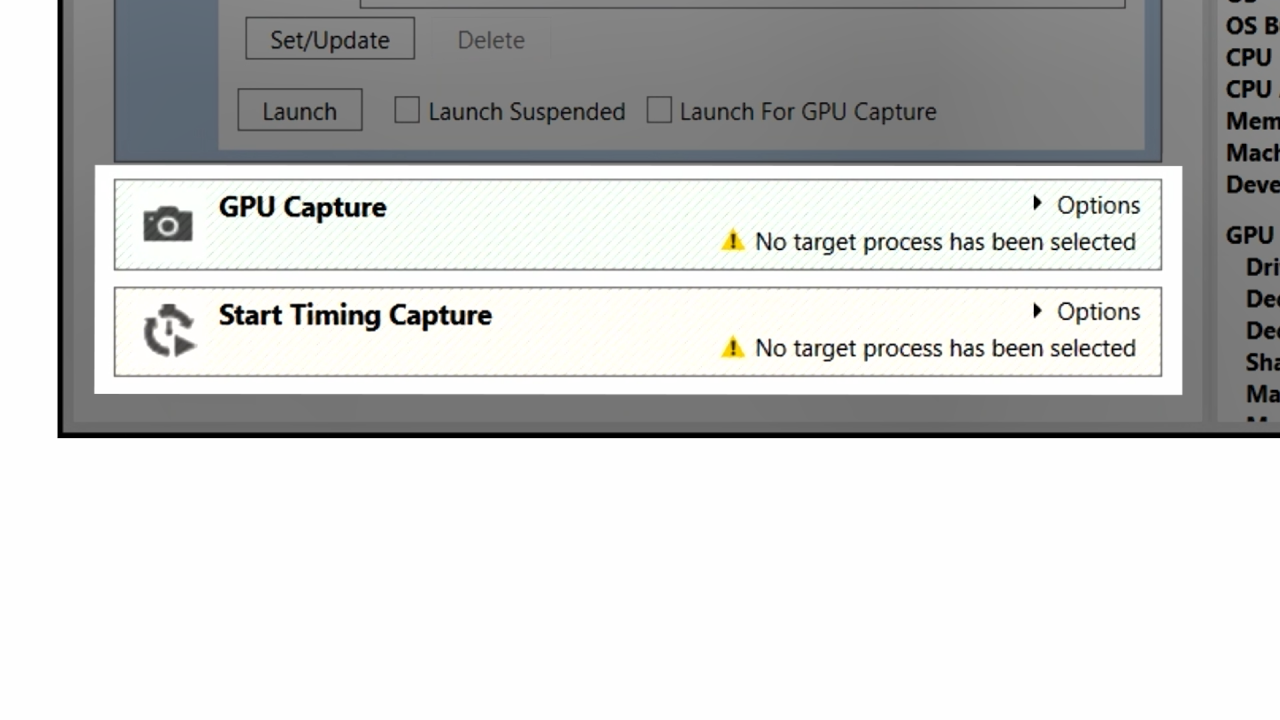
The first thing you’ll need to do is probably the easiest: Opening PIX and doing a quick tour of the two buttons you’ll use most often. These two buttons, GPU Capture and Start Timing Capture, are used to take performance traces, called captures, from the PIX UI.

The GPU Capture and Timing Capture buttons in PIX.
GPU Capture records all of the DirectX12 GPU work submitted by the game. This GPU work can later be replayed, giving you a wide range of GPU debugging and performance analysis features.
Timing Captures, on the other hand, are primarily used to diagnose issues that are related to CPU, memory, and file IO, although there is also some GPU data included in Timing Captures. For example, use this data to see when work submitted by the CPU is run on the GPU.
Before taking a capture from the PIX UI, you’ll need to launch your game from PIX, or attach PIX to an instance of your game that's already running. Use the Launch Win32 tab to launch your game. Enter the path to your executable, and then enter a working directory. You can also enter command-line arguments or any environment variables to set in your game’s process.

Launching a Win32 game in PIX.
If you intend to take a GPU Capture, before launching your game, you must select the Launch for GPU Capture checkbox. Specifying your intention up front for taking a GPU Capture is required because the PIX capture engine must be loaded into your game’s process before any DirectX 12 calls are made. You can also take a GPU capture by attaching to a game that is already running. To do so, the game must have manually loaded the WinPIXGPUCapturer dll in the PIX directory before the game creates its Direct3D 12 device. After doing so, you can attach PIX, and then take a GPU capture.
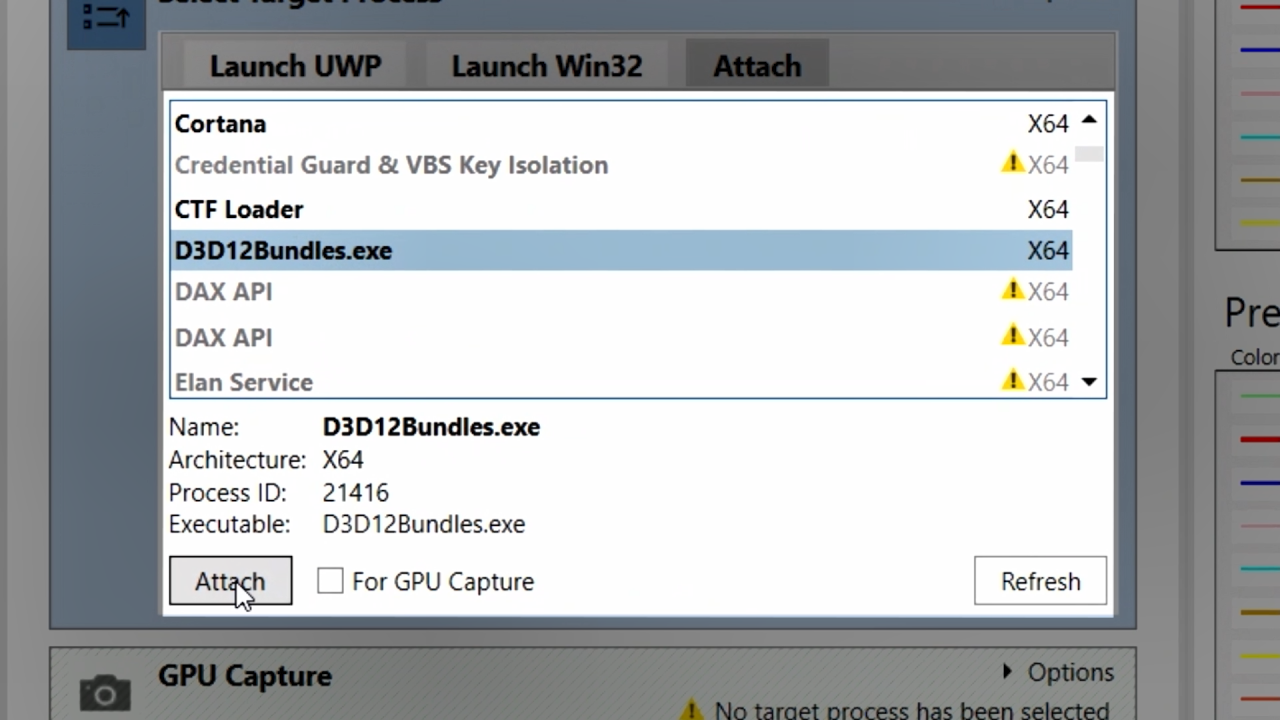
If you intend to take a Timing Capture, don’t select the Launch for GPU capture checkbox before launching your game. Before taking a Timing Capture, you can also connect PIX to a game that's already running. Use the Attach tab to do so.

Using the Attach tab to connect a game that's already running.
After attaching PIX to a game, the GPU Capture button isn’t available if the game wasn’t launched for GPU Captures. However, the Start Timing Capture button is available.
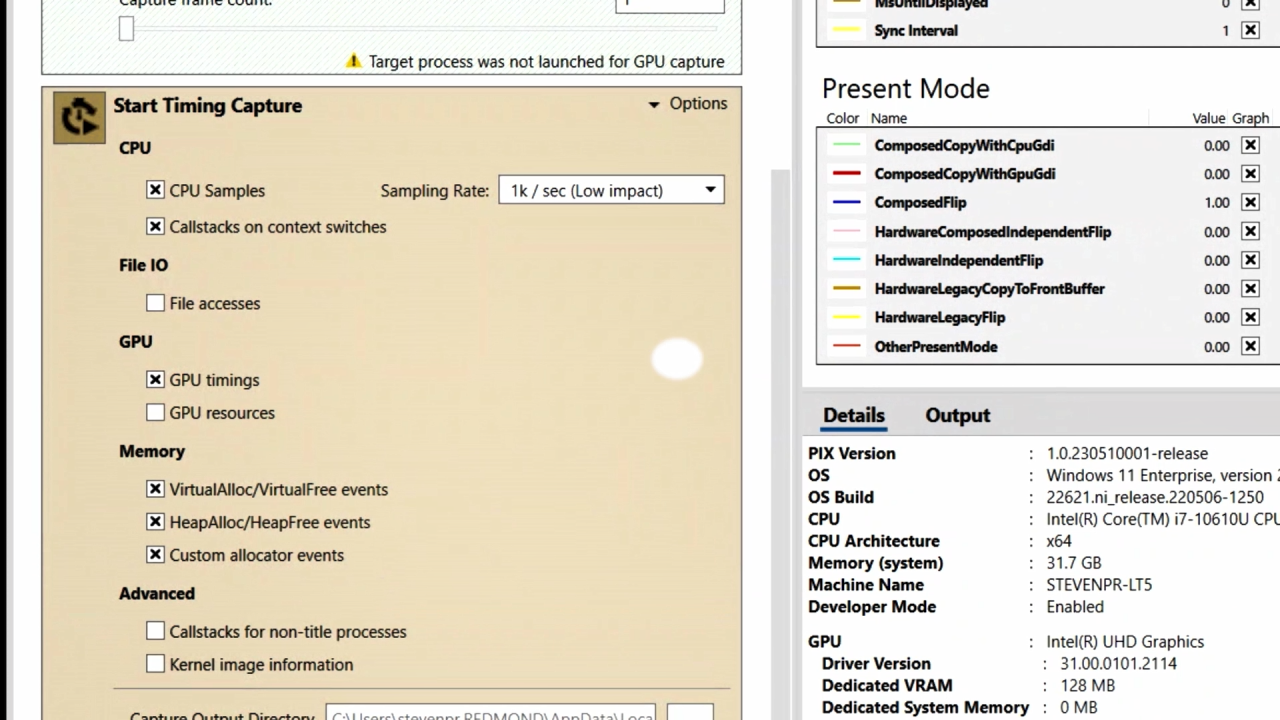
Also note that both GPU Captures and Timing Captures have several options that you can select before starting a capture. For GPU Captures, for example, you can select the number of frames to capture. For Timing Captures, there are options to select the types of data to collect, along with various data collection rates.

Some of the options available for Timing Capture.
Once the capture has run, selecting the Stop button opens the Timing Capture to a Summary Layout that provides some analysis that PIX does up front to give you a head start in identifying performance issues in your game.
In the next video in this series, I’ll describe the types of data that’s displayed by PIX. I’ll also go through the steps that are required to add instrumentation to your game by using the PIX APIs. We’ll then have the knowledge we need to begin using PIX to diagnose common performance issues that occur in Windows games.

